
Thursday, December 17, 2009

Thursday, December 10, 2009
Phase 3 Progress
By adding fabric to the couch and copper to the reception desk, texture and color is added to the rendering. By scanning in actual samples of these materials, the rendering is able to look realistic and true to the materials that were selected for the space. Next, I will spend time on the flooring as well as shadowing.

Phase 2 Progress

Phase 1 Progress
 After increasing the canvas size, I am able to decrease the images opacity in order to draw lines over the image. These lines give the rendering a feeling of being hand-drawn. Next, I add filters to the people and lights to give it a more sketchy feel.
Wednesday, December 9, 2009
Revit Kid example
Saturday, August 15, 2009
Revit Classroom Workflow - Step 6
Presentation
I received and e
mail asking about how I would/have created presentation style boards and images in Revit. Thanks to this email I finally am finishing up the very last step in my Revit Classroom Workflow!
The project I am going to use as an example is my very first Revit studio project. This is the project that forced me to learn everything I know now. It was also completed on the eve of the Revit 2009 release (hence the very first release with aw
esome looking renderings). As it is with every project in Revit if I knew then what I know now there would be many things I would have done differently. Nonetheless, I am still proud of it. I thought this would be a perfect example of a presentation board.
The project called out for two 20"x30" presentation boards and a set of drawings to go along with it. I fiddled with different ways to present my Revit models and found my favorite was with renderings (of course, the WOW factor always wins).
With very little knowledge of Revit and the help of videos online I was able to crank out a ton of renderings. How did I have time during a design studio to Render all 20 or so renderings, you ask? Well... good old Revit sped up the CD process and I was finished two weeks ahead of my personal schedule.
My computer stayed on for many nights and days rendering away. From those 20 to 30 renderings I moved out of Revit and over to Photoshop.
I sketched out some ideas of layouts for the board and where I would place all the renderings. (Wow, so even after all the design and CD's I am still sketching by hand? Yet people still argue Revit eliminates paper and pencil). With simple cropping, editing, and very basic photoshop knowledge I was able to create the layout I was looking for.
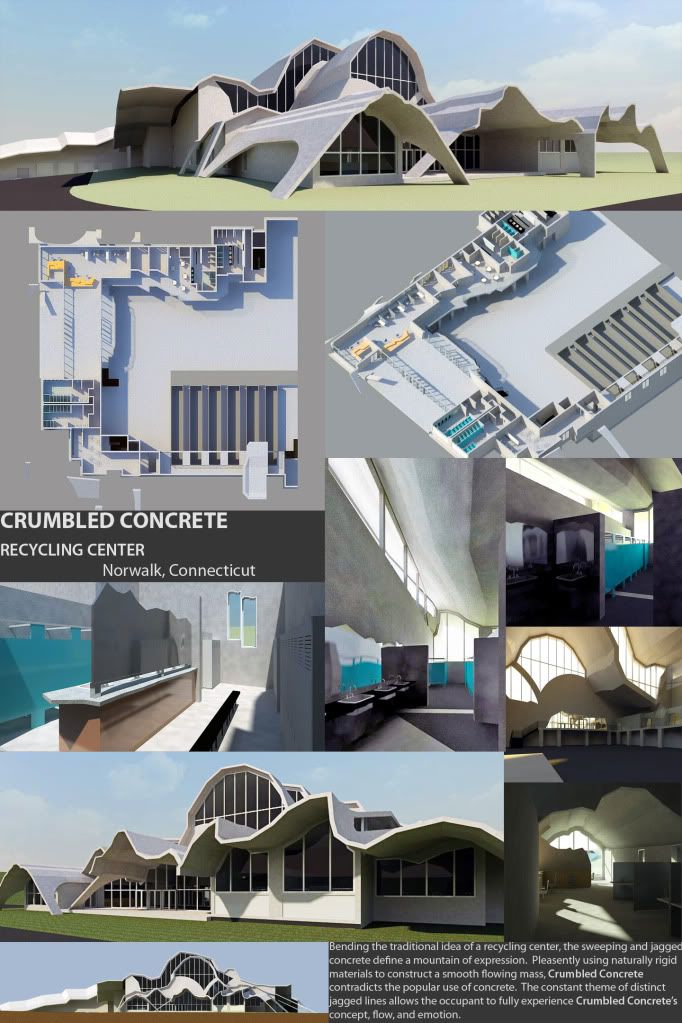


I hope these little examples will sort of give you an idea of what you can do with your intelligent Revit model. Using Photoshop for the layout and editing, in my opinion, allows for much more freedom of the renderings, printing, cropping, and overall graphics. I know some students who have tried creating layouts like this within a Revit sheet. I would not recommend it for you will be asking for a head ache.
Here is another example of something cool you can do with rendering in Revit and a little photoshop knowledge. I used this as a page in my portfolio but the idea could be used in presentation as well.


Tuesday, December 8, 2009
The Photoshop Process
After switching files with Kristen today, I have begun the process of re-producing her Revit project in Photoshop. The step by step process that I will follow is as follows...
1. Export her lobby view as a jpeg
2. Add people in photoshop
3. Print the view on 11 x 17 paper
4. Using trace, draw over the lines of the view with pen
5. Scan the trace drawing back into the computer
6. Open the sketch in Photoshop and begin the rendering process
a. Add people
b. floor finishes
c. Ceiling and wall finishes
d. Materials on all furniture
e. Add detail
f. Add lighting
g. Shadows
Switching Files
Today, Ashley and I exchanged files. We have finished our renderings for studio, so now we will render each other's views. I will render Ashley's view in her revit file, using her finished rendering she did in photoshop as my guide to materials.
I have given Ashley my final rendering, and a revit line view, so that she can use photoshop to render mine, using my final revit rendering as her guide to materials.
Subscribe to:
Posts (Atom)